Thursday, August 29, 2013

Lemon and Poppy Seed Cupcakes with Vanilla Buttercream frosting


I have been wanting to make these cupcakes for ages, like literally a year. My sister Jacqueline had tasted one and said I had to make them. I'm a huge fan of poppy seed bread (dangerously so) and so I was only too happy to bake them. There was only one problem...............trying to find poppy seeds!

I tried everywheerree. They didn't want to be found.


So when I spotted on my daily dose of bloglovin' that a fellow baker/blogger, Hazel from cupcakery had found them. I couldn't have been happier. I purchased a 1kg bag so be prepared to be bombarded with poppy seed recipes :)


These cupcakes are zesty lemony goodness. They are honestly the nicest lemon cupcakes I've ever tasted. The poppy seeds add lovely little dots of crunch. They are light and perfectly lemony. I went with a vanilla buttercream to balance the zesty cake. It was moist,lemony with a little crunch,they are delicious!


Recipe for Lemon and Poppy Seed Cupcakes with Vanilla Buttercream Frosting


Makes 12


Ingredients


Lemon and Poppy Seed Cupcakes

  • 175g butter, softened
  • 175g caster sugar
  • 2 eggs, room temperature
  • 60ml full fat milk, room temperature
  • zest of 2 lemons
  • 1tbsp lemon juice
  • 225g self-raising flour
  • 2 tbsp poppy seeds

Vanilla Buttercream Frosting

  • 225g unsalted butter,softened
  • 400g icing sugar
  • 1tsp vanilla extract
  • 1 tbsp full fat milk, room temperature

Instructions


Lemon and Poppy seed Cupcakes

  1. Preheat oven to 160°C. Line cupcake pan with cupcake liners.
  2. In large bowl, beat butter until completely softened. Add caster sugar and beat until light and fluffy. This may take a few minutes. Gradually add eggs and beat until well combined. Add milk,lemon zest and lemon juice and mix well.
  3. Gently fold in flour and poppy seeds until mixture is well combined.
  4. Bake in oven for 12-15mins or until a skewer comes out clean.
  5. Try and avoid temptation (which nearly killed me!) and leave cool on wire rack.

Vanilla Buttercream Frosting

  1. In a large bowl, beat butter until extremely softened and almost fluffy.
  2. Add icing sugar and slowly beat working up to full speed. If you go full speed straight away you will end up with an icing sugar cloud and it goes everywhere......been there!
  3. Add milk and vanilla extract and beat mixture until light and fluffy.
  4. Pipe or just dollop on cooled cupcakes.....mmmm!


These cupcakes are honestly so good........I'm baking them again this weekend!

Happy Thursday :)

Shirley x


Thursday, August 22, 2013

Cinnamon Banana Bread


We are big banana eaters in my house. I wasn't much of a banana eater (with the exception of banana ice-cream!) until recently but now I'm obsessed. I love a banana with a cup of tea, which is probably the weirdest combination of all time but trust me its yum and so filling.

I've had banana bread once or twice and always found it just okay. This loaf however has CINNAMON which changes everything. It gives it a deliciously warm hint of spice and sweetness. The bananas make this a super moist loaf. The kind of cake that sticks to the roof of your mouth.

This loaf is what i imagine Autumn tastes like. It holds great in the cupboard, infact it's even better on day 2 and 3!


Recipe for Cinnamon Banana Bread


Makes 1 loaf

Ingredients


  • 220g plain flour
  • 1 tsp cinnamon
  • 1/2 tsp bread soda
  • 150g caster sugar
  • 45g butter,room temperature
  • 2 eggs
  • 1 tsp vanilla extract
  • 2 large ripe bananas

Instructions

  1. Preheat oven to 180°C. Grease and line loaf tin.
  2. In a large bowl beat butter until completely softened and add sugar. Continue beating. Gradually add your eggs until mixture is creamy.
  3. Mash bananas. Addd banans and vanilla to mixture and beat slowly. Sieve flour,cinnamon and bread soda together. Fold into mixture until it is 'just mixed'. Don't worry if there are a few lumps!
  4. Pour into prepared tin and bake for 45-50 mins or until a skewer comes out clean.
  5. Cool in tin for 10 mins and transfer to wire rack.


Hope everyone is having a great week!

Shirley x

Thursday, August 15, 2013

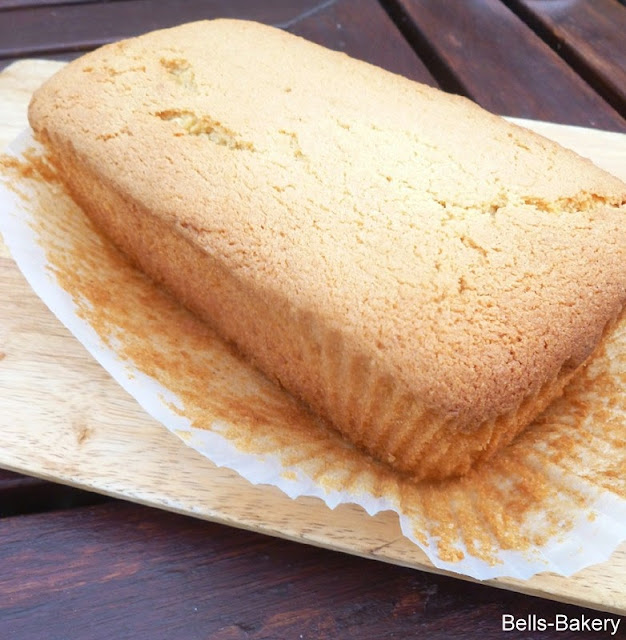
Madeira Cake


The last few days in work have been mayhem. It's either a feast or a famine in the art world and this week has been car-a-zeeee. I've literally been getting home having my dinner, then straight into a fight with myself to stay awake. 10pm was usually the latest I could get to. It's just one of those weeks!

It was the perfect week for Madeira cake however. A big chunky slice smothered in raspberry jam and a warm cup of tea.....hmmm comfort food. I'm a lover of madeira cake in general. My Dad however is the madeira king, he comes home with all sorts of variations of madeira.......last week was chocolate chip :) I had found some cake liners a few weeks back for a euro(bargain!) so of course madeira had to be made.


Madeira is a firm but light cake. It is moist and crumbly but has a good bite. It is a match made in heaven with most things jam, butter, nutella.......and moooore nutella. Did I mention it's delicious with nutella?
 

Recipe for Madeira Cake


Makes 1 loaf

Ingredients

  • 175g butter, softened
  •  35g light brown sugar
  • 125g caster sugar
  • 3 eggs, room temperature
  • 1/2tsp vanilla extract
  • 200g plain flour
  • 50g almonds
  • 1 1/4tsp baking powder

Instructions

  1. Preheat oven 170°C. Line and grease baking tin.
  2. In a large bowl, beat the butter until completely softened. Add caster sugar and brown sugar and beat until light and fluffy. Lightly whisk eggs and vanilla extract together. Slowly add eggs to mixture until fully incorporated.
  3. Sieve plain flour,almonds and baking powder together. If almonds do not sift properly give mixture a whisk and make sure there are no lumps. Fold flour,almonds and baking powder into mixture until well combined.
  4. Pour into prepared tin and smooth top. Bake in the oven for 50-55mins. Leave cool on wire rack.

As you may know from reading my little blog I can never leave anything cool properly without tasting it. Hence my cake being so crumbly in the photos. This cake is so much nicer cooled fully.It's even nicer the next day...........with.....ahem.... nutella :)

Shirley x

Tuesday, August 13, 2013

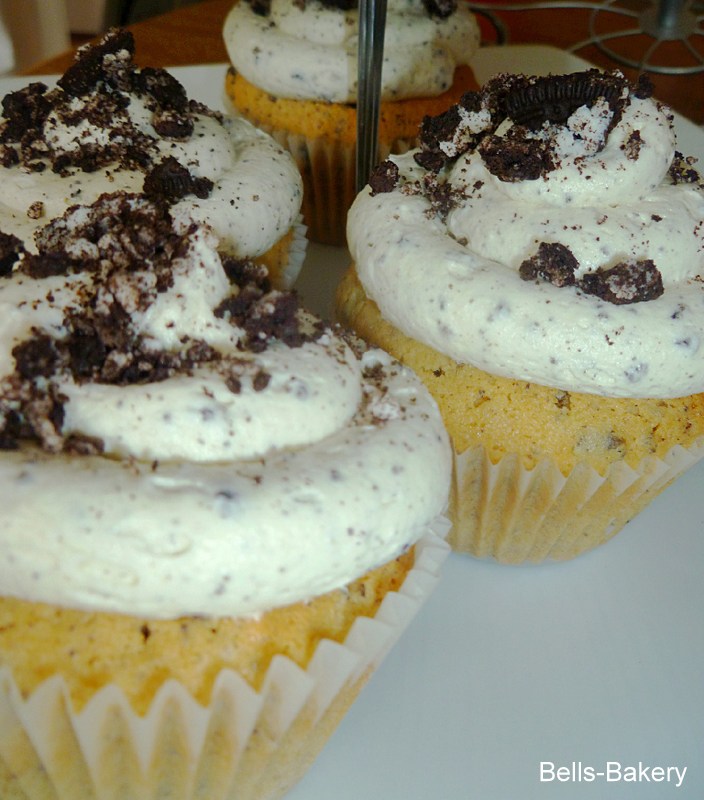
Oreo Cupcakes With Oreo Buttercream Frosting

Warning: Major overuse of the word "Oreo" in this post :)

Is it just me or are Oreo cupcakes everywhere? Every blog, website seem to be obsessed with these cupcakes. So naturally, being the nosy baker I am, I had to see what all the fuss was about. There are about a bijillion recipes out there. In fact I don't think there is any one specific Oreo cupcake recipe. I decided to do my own thang and chuck Oreos into my usual vanilla cupcake batter and buttercream.

The results were not too shabby at all. I did do the "hidden Oreo" at the bottom of the cupcake which is probably a must when making these. They have the dense dark chocolatey flavour of the Oreos with the light vanilla sponge in contrast. The frosting is creamy and smooth with the crunch of the Oreos.

They are an Oreo lovers dream!


Recipe for Oreo Cupcakes with Oreo Buttercream Frosting


Ingredients

  • 110g butter,softened at room temperature
  • 110g caster sugar
  • 2 eggs
  • 1 tsp vanilla extract
  • 110g self-raising flour
  • 1-2 tbsp full fat milk
  • 3 heaping tbsp crushed Oreo (crumb like)

For frosting

  • 140g unsalted butter,room temperature
  • 280g icing sugar
  • 1-2 tbsp milk
  • finely crushed Oreos


Instructions

  1. Preheat the oven to 180C and line a 12-hole muffin tin with paper cases.  If you would like to do the "hidden Oreo" at the bottom. Place a full Oreo flat at the bottom of each paper case.
  2. Cream the butter and sugar together in a bowl until light and fluffy. Beat in the eggs a little at a time and stir in the vanilla extract.
  3. Fold in the flour and crushed Oreo crumbs using a large metal spoon, adding a little milk until the mixture is of a dropping consistency. Spoon the mixture into the paper cases until they are two-thirds full.
  4. Bake in the oven for 15-20 minutes, or insert a skewer into one of the cupcakes until it comes out clean. Set aside to cool for 10 minutes, then remove from the tin and cool fully on a wire rack.
  5. For the frosting, beat the butter in a mixer until slightly pale,add sugar and continue beating until light and fluffy. This may take a few minutes. Fold in desired amount of finely crushed Oreos (this additon of crumbs will make your frosting an off white colour) and top as you please. I went for larger,chunkier crushed Oreos to give it a bit more bite!


          So there you have my version of Oreo Cupcakes, sure to please all you Oreo lovers out there!


                              Today I'm linking up with the lovely folks over at chef-in-training.com!

Tuesday Talent Show Link Party at Chef in Training! It is held weekly and has some amazing link ups!
Shirley x

Wednesday, August 7, 2013

Chocolate And Vanilla Marble Cake


I cant tell you how many times I've made this cake. It super simple and can be pretty impressive when marbled right. This one was made with a two-year-old helper so the sacred rule of marble cake was broken. Do Not Over Marble Your Cake.......whoops!

This is Rachel Allen's recipe but it's a goodin' so I'm quiet happy to share.It is quiet a moist and crumbly cake. The vanilla is light and airy while the chocolate is rich and almost gooey at times. It is a one batter cake and super simple for any novice baker out there looking to impress.


Recipe for Chocolate and Vanilla Marble Cake


Ingredients

  • 225g butter, softened
  • 225g caster sugar
  • 4 eggs, room temperature
  • 2 tsp vanilla extract
  • 225g plain flour
  • 2 tsp baking powder
  • 50ml milk, room temperature
  • 50g cocoa powder,sifted

Instructions


  1. Preheat the oven to 180°C.Butter and flour the sides of a 8in diameter spring-form cake tin and line the base with greaseproof paper.
  2. Cream the butter in a large bowl or mixer until soft. Add the sugar and beat until the mixture is light and fluffy.Whisk the eggs and vanilla extract together in a small bowl. Gradually add the eggs to the butter mixture, beating all the time. Sift in the flour and baking powder and fold in gently to mix, then add the milk and mix gently to combine.
  3. Tip half of the cake mixture into another large bowl and, into this bowl, fold in the sifted cocoa powder.
  4. Place the cake mixtures into the tin by alternating spoonfuls of the vanilla batter with the chocolate batter, then with a skewer or something similar, gently draw swirls through the cake mixture to ‘marblise’ it. Again Do Not Over mix. Bake in the oven for 45 minutes or until a skewer inserted into the middle comes out clean.
  5. Leave to cool on wire rack or eat warm..............its pretty nice both ways!


Easy,simple cake.......hope you all enjoy!

Shirley x

Monday, August 5, 2013

Mini Lemon Meringue Pies


Lemon, Meringue, Pie..........................whats not to like? I've made this a few occasions but never as individual pies. They are super cute and perfect for any occasion, or if you're anything like me, a mid-morning snack with a cup of tea. These were gone in no time in my house. I think its because you kinda have to have two....as my sister said "ill just have another one....just to be sure they're nice!" suuuure.


You would think by the look of these pies that they're going to be dense and heavy. Its the complete opposite, they are so light and airy. The lemon curd is refreshing and smooth, it has just enough lemon zing and sweetness. In other words its not going make your eyes squint and cheeks suck in (yes we've all been there) on your first bite.

I piped the meringue using my Wilton 1M tip but if you want to glob it on forming peaks by all means do. I just liked the ice-cream effect it gave!


Recipe For Mini Lemon Meringue Pies


Makes 12-15

Ingredients


Pastry

  •  330g plain flour, plus extra for dusting
  • pinch of salt
  • 3 tbsp caster sugar
  • 175g cold butter, cut into small pieces

Lemon filling 

  •  300g caster sugar
  • 100g cornflour
  • 120ml lemon juice (2-3 lemons)
  • 4 large egg yolks
  • a pinch of salt
  • freshly grated zest of 2 lemons, unwaxed if you can
  • 60g butter

 Meringue 

  • 250g icing sugar, sifted
  • 4 large egg whites


Instructions

  1. To make the pastry, sift the flour and salt into a large bowl. Add the caster sugar and combine. Add the butter and mix on high speed until the mixture resembles fine breadcrumbs this will take literally seconds. You can also rub it in using your fingertips until you get breadcrumb like consistency. Add 4-6 tablespoons of water, one tablespoon at a time, until the dough comes together to form a ball. Wrap the dough in cling film and flatten out. Place it in the fridge to rest for approx 30mins.
  2. For the lemon filling, place the sugar, cornflour and 450ml of water in a large saucepan and stir until sugar is dissolved. Stir in the lemon juice, egg yolks and salt. Bring to the boil and continue stirring for approx 10 mins, this can become a bit of a workout! Stir in your lemon zest and butter, stir until butter is melted,remove from heat and allow to cool.
  3. Preheat the oven to 180°C and grease and flour the muffin trays.Roll out the pastry on a lightly floured work surface about 3mm thick. Cut out desired shaped for pastry. I cut mine into rectangles as to get uneven chunky sides, it also holds more curd than a perfectly rounded pastry but do as you wish. Press each rectangle into your muffin tray and prick the base with a fork. Place in oven for approx 10 mins. Remove from oven and set aside to cool.Reduce oven to 170°C.
  4. For the meringue, in a mixer or a hand-held mixer, whisk the icing sugar and egg whites together on high for 10 minutes until stiff glossy peaks form. These peaks should be able to stand on their own when whisk is removed without collapsing. Fill piping bag and pipe, if desired or go for a big glob raising some peaks using a fork. Bake in oven for 10-15 mins. The meringue should turn a light pinky/brown colour. Don't be alarmed if you get some darkened bits, it will just be extra crunch!
  5. Remove from oven and allow to cool.........this is torture to some folks I know but really try! They are sooo much better cool!

Hope everyone has a great bank holiday or happy Monday wherever you are popping by from!

Shirley x

Friday, August 2, 2013

Teddy Bear Baby Cake


A simple baby shower cake. The momma-to-be didn't know what she was having so I went for a blue bear for a boy and a pink bear for a girl. I added a little play block in front with some question marks. I also did a quilted effect which I had never done before but it was very easy.

The cake was Chocolate Biscuit Cake and vanilla buttercream. I loved the way the teddy's came out! They are super cute, if I may say so myself. I made these using gumpaste a few days before and they set perfectly. Happy baker over here :)

Hope everyone has fab weekend!

Shirley x