Showing posts with label Brownies & Bars. Show all posts

Tuesday, February 18, 2014

Warm Rolo Stuffed Brownies


I have been wanting to stuff rolos into baked goods for quite some time. I dabbled around with cupcakes, cookies but eventually decided on brownies. I had seen a pin of a stuffed brownies and it just sealed the deal....I wanted them and I wanted them nooooow! (Enter Veruca Salt from Willy Wonka lol)

I mean just look at them. Drool worthy....perfect for my weekend treat! Warm brownies out of the oven are one of my biggest downfalls.... I HAVE to taste them while they are still warm, I just loooooove the warm chocolate gooeyness.


I used the same recipe as I did for my White Chocolate Chip Brownies and added some frozen rolos. I did not bake them as long as I usually would and I froze my rolos first. I did not want the rolo caramelly goodness to spread just everywhere. I wanted them to remain in one spot so there was globs ( that a word?!) of caramel here and there. Admittedly the chocolate on the rolos melted so the golden caramel colour was lost but all was forgiven after one bite.

They were beyond super moist but just baked enough that there was still a slight bite to it. The minute these hit your lips they just melt in a warm chocolatey goo. Then you get a hit of the sweet gooey caramel that can only be described as moreish. We ate these warm (which was a pain in the ass to photograph!) but they are just a tasty cool. I had two this morning, the second one I gave about 5 seconds in the microwave and it was like it was straight out of the oven :)


Recipe for Rolo Stuffed Brownies


Ingredients


  • 175g good-quality dark chocolate (70-80% cocoa solids)
  • 175g butter,cubed
  • 25g good-quality cocoa powder,sifted
  • 3 eggs
  • 125g caster sugar
  • 100g demerara sugar} alternatively use 225g light brown sugar instead of caster and demerara sugar
  • 1 tsp vanilla extract
  • 100g plain flour
  • 2 tubes of Rolos (15 Rolos and one or two leftover for you)

20 x 20cm (8 x 8in) square tin


Instructions

  1. Stick the two packs of rolos into the freezer for a half hour or more. Preheat the oven to 160°C (fan-assisted oven). Line the base and sides of the tin with parchment paper. 
  2. Melt the chocolate, butter and cocoa powder together in a heatproof bowl set over a saucepan of simmering water. Do not let the base of the bowl touch the water. Remove from the heat.
  3. In a separate large bowl, whisk the eggs, both sugars and vanilla extract for 2-3 minutes on high speed until the mixture looks thicker almost whipped like. Continuing to whisk, add the chocolate mixture until well combined. Sift in the flour and add your chocolate chips. Fold through with a spatula. 
  4. Spoon the mixture into the prepared tin and push your rolos lightly into your mixture. I did 5 across and 3 down but fit as many or as little as you wish. Do not put them all the way down to the bottom of the mixture as the mixture will rise up over them while baking. This make the rolos perfectly centered. 
  5. Bake in the oven for 25 minutes. When cooked, it should be dry on top but very 'gooey' inside. If you wish to leave them in longer do so just be sure not to leave it too long or it will become cake and not moist,gooey brownies. Leave cool in tin for 5 mins,then 5 minutes on wire rack and cut, which is difficult if serving warm. I cut them length ways first. Leave them cool for another 5 Minutes and then square them off. Another idea would be to leave them cool entirely, cut and then heat up. 

The latter would be a great idea for a quick dessert at a dinner party with a big dollop of ice-cream.

My sweet tooth just couldn't wait :)

Happy Tuesday!

Shirley x

Thursday, January 23, 2014

White Chocolate Rice Krispie Treats


I LOOOOOVE white chocolate, always have done. It's just creamy, sweet and delicious......everything that makes me happy!

Mixing chocolate with rice krispies is something we do regularly here in our house. When we were younger, we had to leave them set and become a rice krispie bun. I can't remember the last time we actually let them set. My sister and I literally eat it out of the bowl, chocolate still warm with the crunch of the krispies.........Sometimes it really is the simple things!

This recipe is not exactly ground breaking nor is it rocket science. This is actually what makes it so great. Plus they are great to make with kids. My nephew is two so he loved to play 'helpuh' with me.


Recipe for White Chocolate RKT


Ingredients


  • 100g butter
  • 400g marshmallows
  • 300g rice krispies approx
  • 100g white chocolate......not chocolate chips.

Instructions

  1. In large saucepan over low heat, melt your butter. Add marshmallows and stir until melted and well mixed. Keep stirring for about 2 minutes and then remove from the heat.
  2. Add your rice krispies (if you feel the need to add more or less, do so!). Stir until well combined.
  3. Using the back of a spoon, press the mixture firmly into a buttered 8x12in tin. Cut into desired sized squares when cooled.

I do make mine quite chunky so do feel free to half the quantities for a smaller tin. I have and it works out perfectly.

Hope you are all having a great day :)

Shirley x

Thursday, January 16, 2014

White Chocolate Chip Brownies


I have a cough and I want the whole world to stop and mind me.

Unfortunately that's not reality lol! A few nights ago on an evening stroll with my sister, we got caught in some fog which has now resulted in the most irritating cough EVER. It's more of a ticklish cough that no matter how many times you cough, it's still there. For the past few nights I have been sleeping sitting up which means no sleep really. So last night I was tired and cranky and wanted something comforting......obviously cake was the answer.

I was in no mood for pulling out cake tins and start the cake process (Me?!....I must have been really feeling sorry for myself), I wanted something quick,comforting and moreish! Brownies were the answer :)


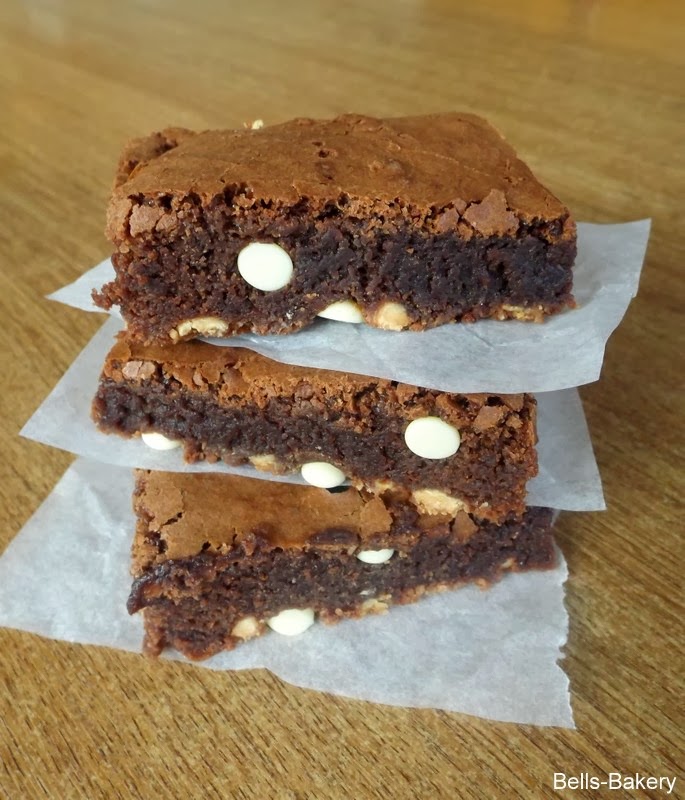
It's been quite awhile since I've had brownies and I honestly don't know why I don't whip them up more often. They're moist,warm and cakey. I'm just lucky there wasn't ice-cream in the freezer because I would have demolished the lot in my feeling-sorry-for-myself state. Adding the White chocolate chips gave them little dots of sweet creaminess here and there, they were exactly what I needed. Yaaay for Brownies :)


Recipe for White Chocolate Brownies


Ingredients


  • 175g good-quality dark chocolate (70-80% cocoa solids)
  • 175g butter,cubed
  • 25g good-quality cocoa powder,sifted
  • 3 eggs
  • 125g caster sugar
  • 100g demerara sugar} alternatively use 225g light brown sugar instead of caster and demerara sugar
  • 1 tsp vanilla extract
  • 100g plain flour
  • 100g white chocolate chips

20 x 20cm (8 x 8in) square tin


Instructions

  1. Preheat the oven to 160°C (fan-assisted oven). Line the base and sides of the tin with parchment paper. 
  2. Melt the chocolate, butter and cocoa powder together in a heatproof bowl set over a saucepan of simmering water. Do not let the base of the bowl touch the water. Remove from the heat.
  3. In a separate large bowl, whisk the eggs, both sugars and vanilla extract for 2-3 minutes on high speed until the mixture looks thicker almost whipped like. Continuing to whisk, add the chocolate mixture until well combined. Sift in the flour and add your chocolate chips. Fold through with a spatula. 
  4. Spoon the mixture into the prepared tin and bake in the oven for 30-35 minutes. When cooked, it should be dry on top but still slightly 'gooey' inside. Don't be tempted to leave it in the oven any longer than this or you will have cake and not brownies. Allow to cool in the tin, then cut into squares or any shape you desire.

These cheered me up no end last night. Sometimes you just need cake!

Hope everyone is having a great Thursday :)

Shirley x

Tuesday, January 29, 2013

Chocolate Hazelnut Butterscotch Bars


Chocolate, butterscotch and hazelnuts?!!.......Um.... yes please.

I've never made butterscotch from scratch before so these were a whole new experience for me. It's delicious, it has a real buttery, almost creamy taste and with the crunch of the hazelnuts and chocolate topping. I was in heaven.

I was unsure as to what to use for a base so I went for the safe option of a biscuit ( So glad I did ). The base is a very light crumbly biscuit which I think complimented the butterscotch perfectly. These bars are so versatile. Next time I plan on making them with chocolate covered raisins or maybe some walnuts :)


Recipe for Chocolate Butterscotch Bars

Makes 24

Ingredients

For the biscuit :


  • 225g plain flour
  • 1/2 tsp baking powder
  • 150g plain chocolate
  • 115g unsalted butter
  • 50g light muscovado sugar
  • 2 tbsp ground almonds

For the Topping :


  • 175g unsalted butter
  • 115g caster sugar
  • 2 tbsp golden syrup
  • 175ml condensed milk
  • 150g whole toasted hazelnuts
  • 225g plain chocolate

Instructions


  1. Preheat oven to 160°C. Line your baking tin ( I used a 12 x 8 in). Sift your flour, baking powder into a large bowl. Melt your chocolate over a saucepan of simmering water or in the microwave if you wish.
  2. Rub the butter into the flour until it resembles coarse breadcrumbs, then stir in your sugar. Work the melted chocolate and ground almonds into the mixture to make a light, crumbly biscuit dough.
  3. Spread your dough into the tin. Using a spatula or the back of a spoon, press it down evenly into the sides and corners. Bake for 25-30 mins until firm. Leave to cool in tin.
  4. To make the topping, heat the butter, sugar, golden syrup and condensed milk in a pan, stirring until the butter and sugar have melted. Simmer until golden, then stir in the hazelnuts. Pour over your biscuit base. Be careful, This stuff is sooooo hot! Leave to cool and set.
  5. Melt your chocolate and spread over your butterscotch layer, then leave to set again. Once cooled,cut into bars.


Note : If you want to toast your own hazelnuts. Preheat your oven to 200°C, spread hazelnuts on a baking tray and roast for 5 mins. Keep on eye on them as they will burn easily. After 5 mins or so remove them from the oven and place them in a fine sieve. Give the sieve a good shake and the skins just come right off.

Enjoy!

Shirley x


Monday, February 13, 2012

Chocolate Brownies


Who doesn't love brownies??

One of my favourite things is to get a brownie just out of the oven and add a big dollop of homemade ice-cream hmmm!One of my other obsessions besides baking is Italy,I LOVE ITALY! Hence the making of homemade Pizzas and ice-cream,if you haven't tried to make ice-cream,Go do it!! You will not be disappointed :)


Recipe for Chocolate Brownies


Ingredients


175g good-quality dark chocolate (70-80% cocoa solids)
175g butter,cubed
25g good-quality cocoa powder,sifted
3 eggs
225g soft light brown sugar
1 tsp vanilla extract
100g plain flour
Icing sugar and cocoa powder,for dusting (optional)

20 x 20cm (8 x 8in) square cake tin

Instructions

  1. Preheat the oven to 180°C. Line the base and sides of the tin with parchment paper. 
  2. Melt the chocolate, butter and cocoa powder together in a heatproof bowl set over a saucepan of simmering water. Do not let the base of the bowl touch the water. Remove from the heat.
  3. In a separate large bowl, whisk the eggs, sugar and vanilla extract for 2 minutes. Continuing to whisk, add the chocolate mixture until well combined. Sift in the flour and fold through with a spatula. 
  4. Spoon the mixture into the prepared tin and bake in the oven for 19-25 minutes (depending on your oven). When cooked it should be dry on top but still slightly 'gooey' and 'fudgy' inside. Don't be tempted to leave it in the oven any longer than this or you will have cake and not brownies. Allow to cool in the tin, then cut into squares.
As I said I love mine with ice-cream but they are just as delicious on their own.

Yum!

Shirley.